

How To Make A 3d Heart
Step 1
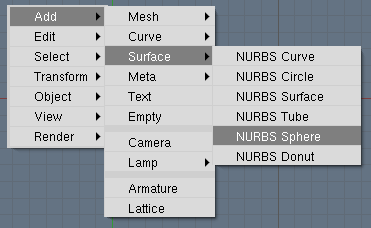
In this tutorial I will create a love-heart by using a standard NURBS sphere, and tweaking its control points. Start off with a clean blender [CTRL][X]. Delete the default cube and add a NURBS sphere to a new scene. NURBS spheres are located in the toolbox ([SPACE]or [SHIFT][A]), under ADD and then SURFACES.
Before you continue, scale up the sphere so that it fills the better part of your screen by pressing [S], moving your mouse and left-clicking when you're satisfied.
Step 2
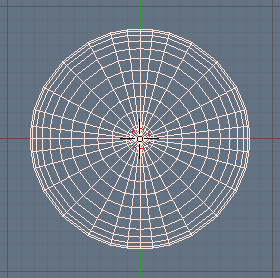
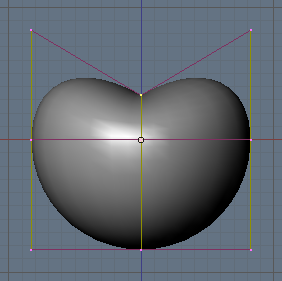
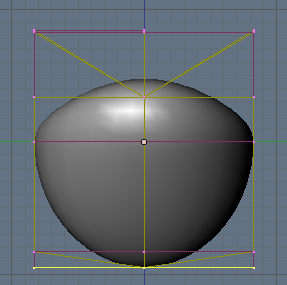
Go to frontview NumPad [1], and enter editmode by pressing [TAB]. Deselect all vertices by pressing [A]. Use border select [B] to select the middle vertices in the top-row of the controlpoints. The figure shows which area to select.
Step 3
If you switch to topview by pressing [NumPad 7], you can see that you have actually selected a couple of vertices that were hidden from your view in the frontview. Using box-select in front-view selects all vertices within the box, even when they are hidden behind each other Before going on, return to frontview by pressing NumPad [1].
Step 4
The next step is to enter grabmode [G], and move the three selected vertices slightly downwards. This will create a nice, smooth bump in the sphere. (I've switched from wireframe to Shaded view by pressing [Z]
Hint: Click the middle mouse button to constrain the motion along one axis.
Step 5
Deselect all selected vertices with [A]. (This is a step that you have to make each time in the remaining steps of this tutorial). Select the three vertices in the top- left and the three in the top-right, and scale them a bit by using the scaling mode [S] so that the top becomes a bit wider. When you are satisfied with it, use the grabber [G] to move the vertices up a bit.
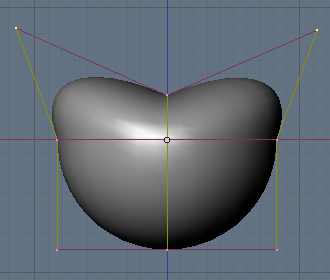
Step 6
Now I will to taper the bottom of the heart. Box-select all the vertices at the bottom [B] and scale them down:
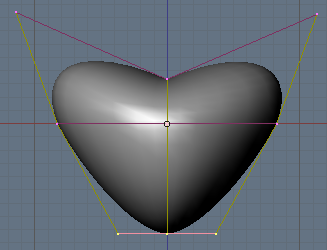
Step 7
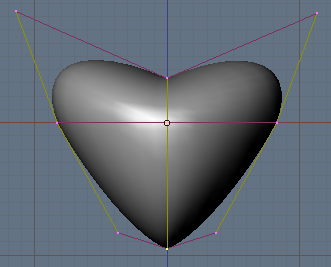
The heart is starting to look good, but the bottom is still a bit blunt. Make it more pointy by box-selecting [B] the middle vertices at the bottom and using the grabber [G]to move them downward.
Step 8
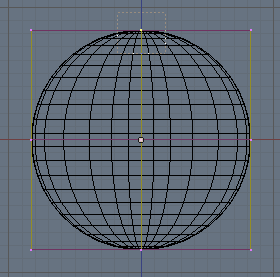
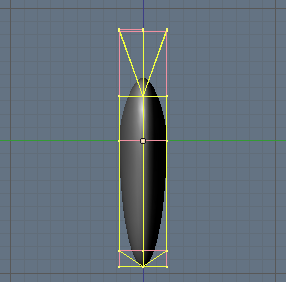
Now, in the frontview our heart looks just fine, but when you switch to sideview NumPad [3], you will see that you have drawn a mighty fat heart!
Step 9
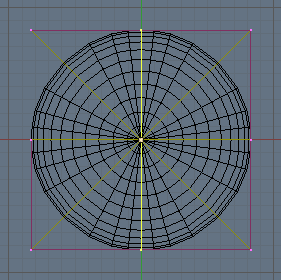
Select all vertices (press [A] twice), and scale everything in the x-dimen- sion. To do this, enter scaling mode, move your mouse horizontally and then press the MiddleButton. This will lock the scaling to only one dimension.
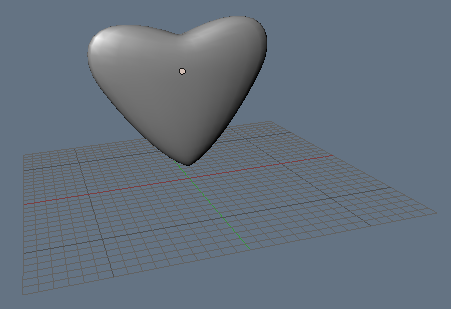
Step 10
Result after scaling
How To Make A 3d Heart
Source: https://www.blendernation.com/tutorials/blender-3d-beginner-tutorial-creating-a-heart/
Posted by: hobbsluldenced.blogspot.com
0 Response to "How To Make A 3d Heart"
Post a Comment